
Inflatable Boat Canopy Installation: A Complete Expert Guide
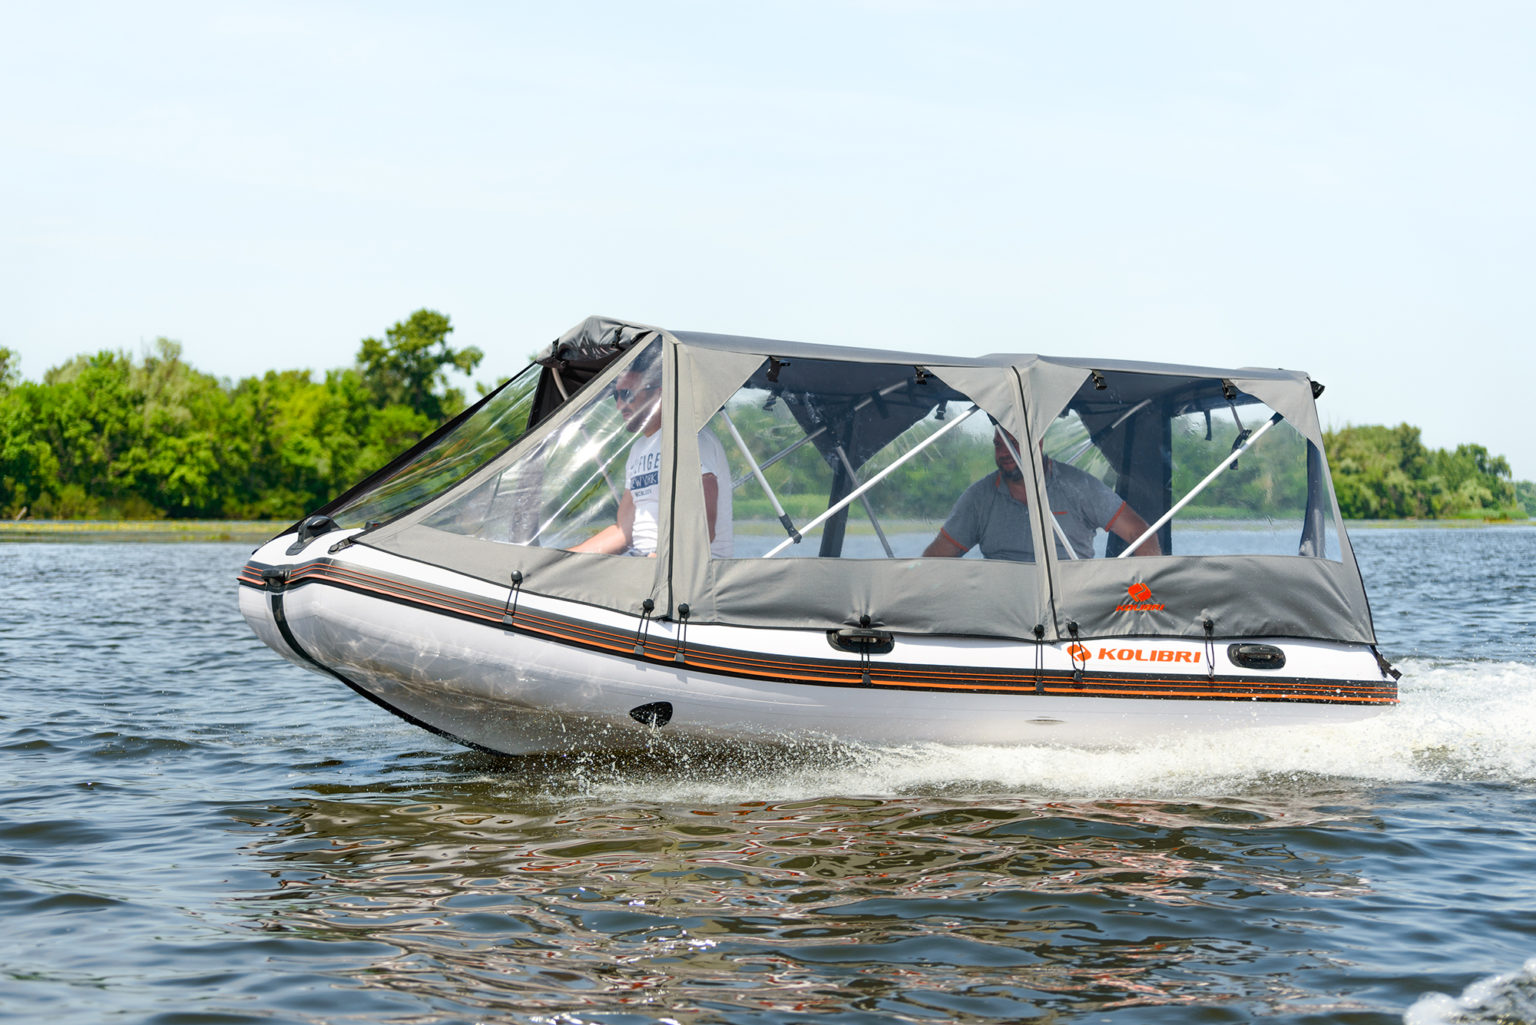
Spending time on the water is more than just leisure — it’s a way to disconnect, recharge, and fully enjoy nature. However, to ensure maximum comfort and safety, it’s essential to protect yourself from environmental factors such as intense sunlight, wind, rain, and splashes.
This is where a boat canopy (boat tent) becomes an essential piece of equipment rather than just an accessory. Especially when using products from KOLIBRI, where canopies are engineered specifically for real-world marine conditions.
Why Proper Canopy Installation Matters
Installing a canopy is not complicated, but it requires precision and attention to detail. One of the most common mistakes users make is skipping the manufacturer’s instructions.
Incorrect installation can lead to:
- poor structural tension
- reduced wind resistance
- water leakage
- potential damage to the PVC tubes
Proper installation ensures:
- long service life
- optimal frame geometry
- reliable protection in various weather conditions
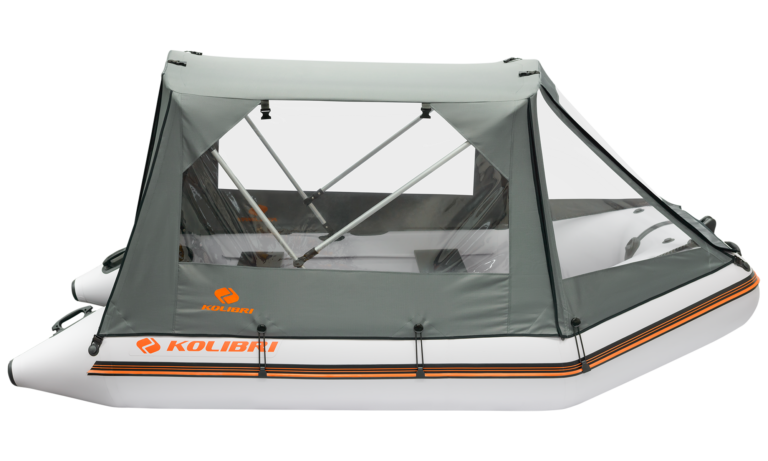
“KOLIBRI” Motorboat Canopy for the Standard, Profi, and SL Series
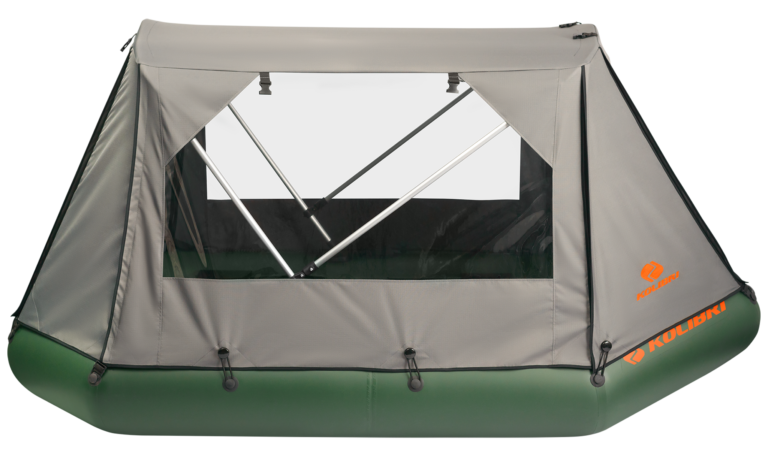
“KOLIBRI” Canopy Tent for Inflatable Rowing Boats
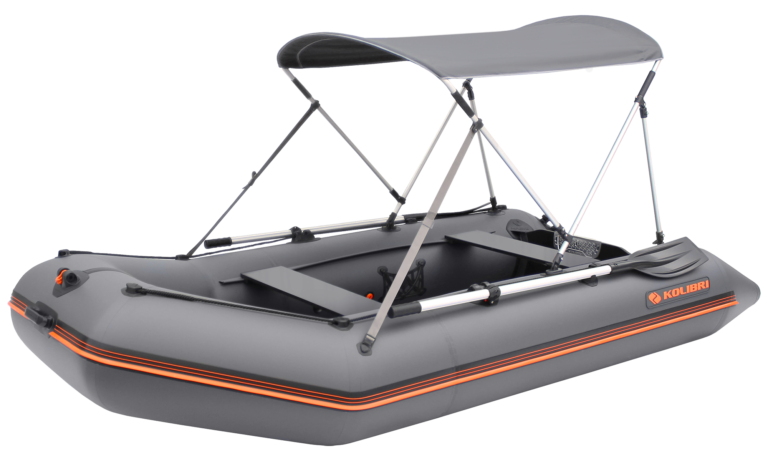
Sunshade for “KOLIBRI” motorized inflatable boats (Standard, Profi, and DSL series)
Modern canopies come in different designs to match various needs:
1. Sunshade Canopies (Bimini Tops)
Lightweight structures that provide shade and partial rain protection.
Ideal for:
- fishing trips
- short leisure rides
- UV protection
2. Full Tent Canopies
Advanced systems that:
- fully enclose the cockpit
- create a cabin-like environment
- allow use in rain or colder conditions
3. Model-Specific Canopies
Designed for:
- motorized inflatable boats (Standard, Profi, SL, DSL series)
- rowing boats
These canopies perfectly match the boat’s geometry, ensuring easy installation and maximum efficiency.
Key Features of a High-Quality Canopy
Durable Materials
High-end fabrics such as:
- Ripstop – tear-resistant structure
- Oxford – balanced durability and weight
- Cordura – extreme wear resistance
Provide:
- waterproof performance
- UV resistance
- long lifespan
Robust Construction
Includes:
- aluminum frame
- reinforced mounting points
- secure fasteners
Ensuring stability even in:
- strong wind gusts
- choppy water
Ease of Installation
A quality canopy:
- installs quickly without special tools
- can be removed in minutes
- is user-friendly even for beginners
Safe Usage Guidelines
To maintain performance and durability:
- avoid high-speed movement with the canopy installed
- do not use in strong winds
- avoid usage below -5°C (23°F)
- always dry before storage
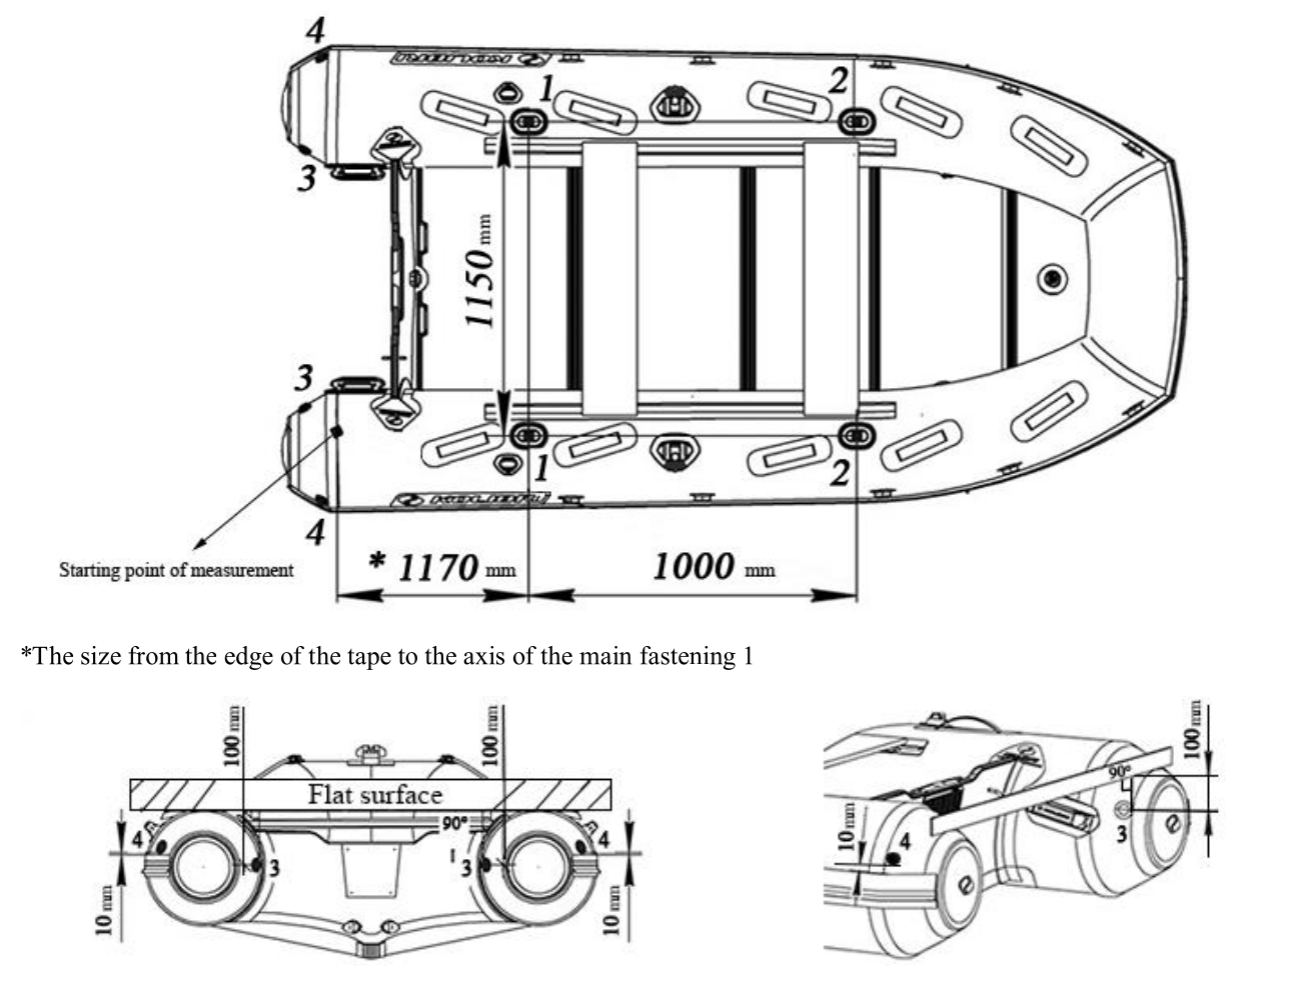
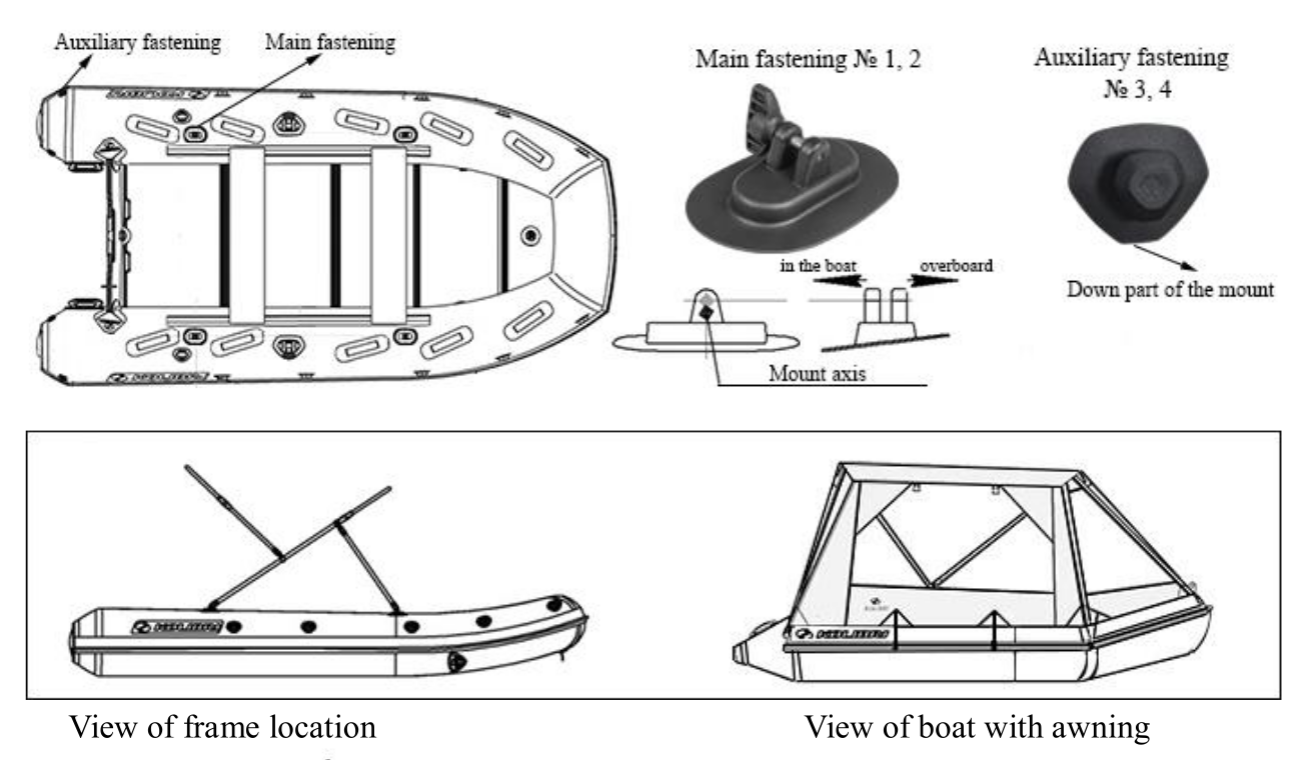
Mounting layout diagram for the KM-360DXL boat model
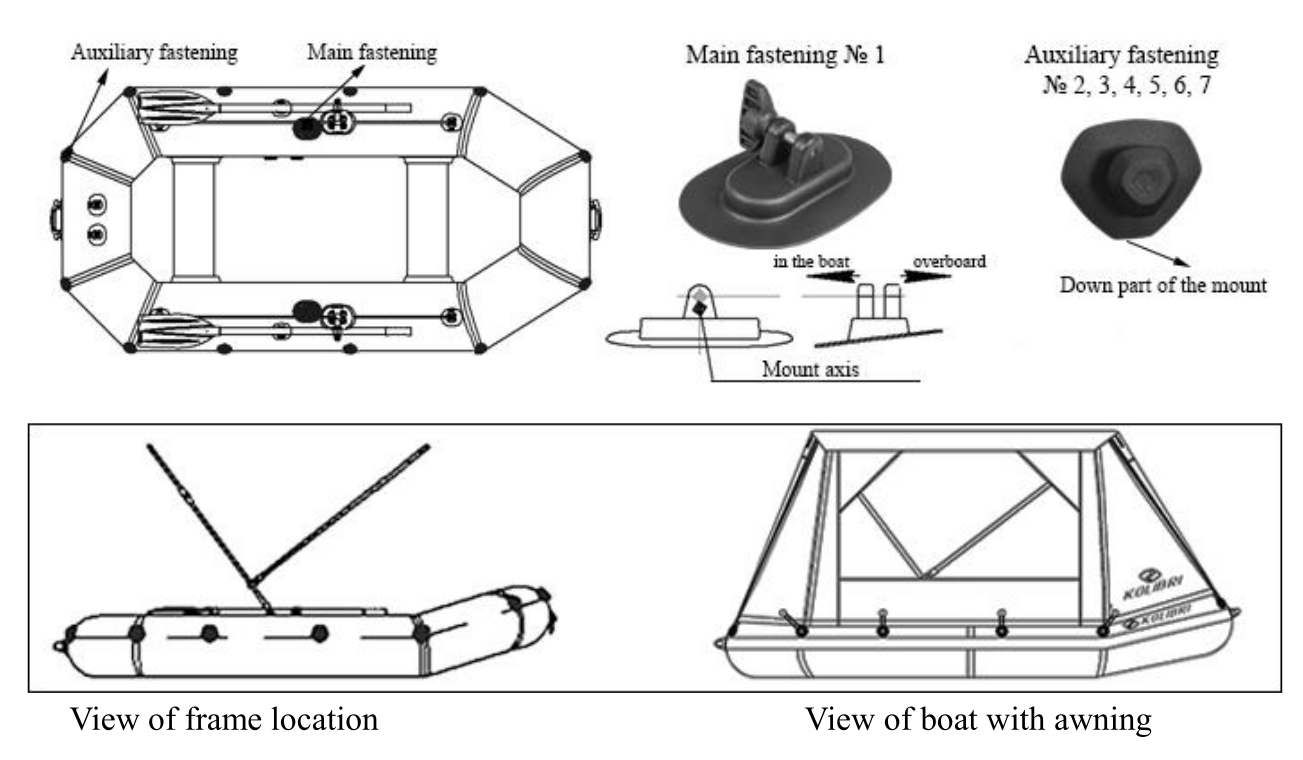
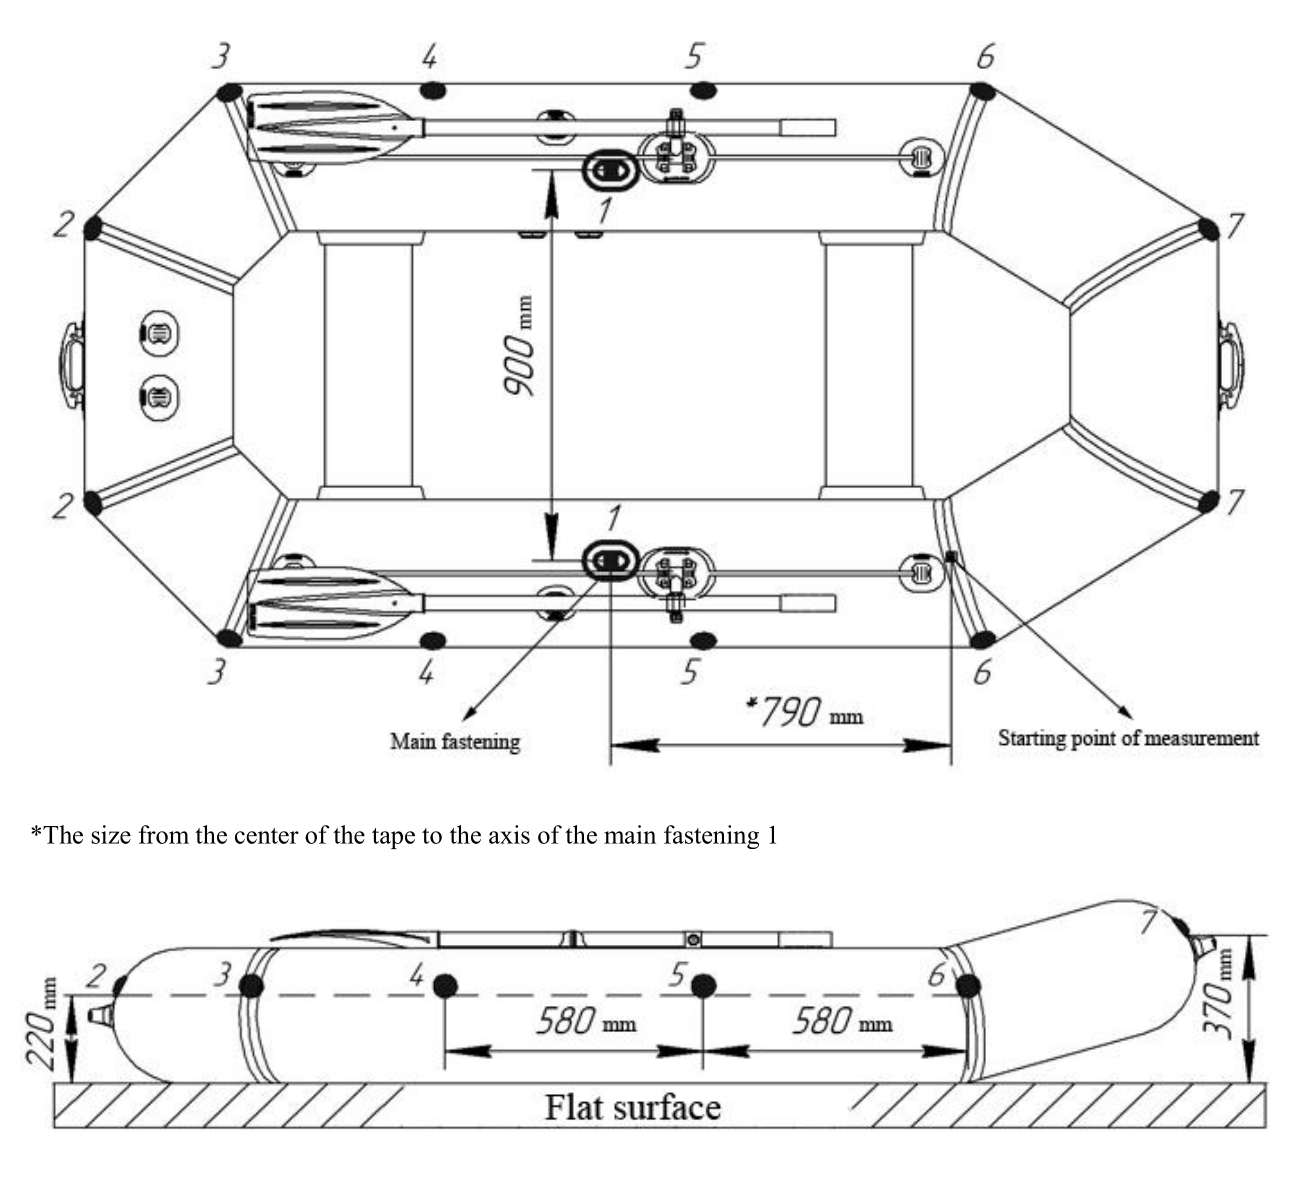
Mounting layout diagram for rowing boats in the “Standard” series
The installation process is similar for both motorized and rowing inflatable boats.
Preparation Checklist
Before starting:
- ensure compatibility with your boat model
- fully inflate the boat
- place it on a flat, dry surface
- clean and dry the PVC surface
Mounting Hardware Installation (Critical Step)
A special PVC adhesive is included with the canopy.
Step-by-step bonding process:
- Mark mounting positions according to the scheme
- Clean the marked areas
- Apply the first thin layer of adhesive and wait 30 minutes
- Apply a second layer and wait 3–5 minutes
- Attach mounts and press firmly using a roller
- Heat gently to 60°C (140°F)
- Press again for secure bonding
⚠️ Important: wait 3–4 hours before installing the canopy.
Final Installation Steps
Once mounts are ready:
- Fix support poles into base mounts
- Identify bow and stern orientation
- Insert frame arcs into canopy sleeves
- Connect frame elements until they click into place
Pro Tips:
- motor boats: install from stern to bow
- rowing boats: install from bow to stern
This ensures proper tension and alignment.
Common Installation Mistakes
Even experienced users may encounter:
- incorrect frame alignment
- weak bonding of mounts
- installation on a deflated boat
- ignoring temperature requirements
Result: reduced performance and shorter lifespan.
Conclusion
A properly installed canopy:
- enhances comfort on the water
- protects against weather conditions
- extends boat lifespan
- improves overall usability
It allows you to fully enjoy your time on the water without compromise.